Instrumentalist Classic: Originally published: Sept. 1982
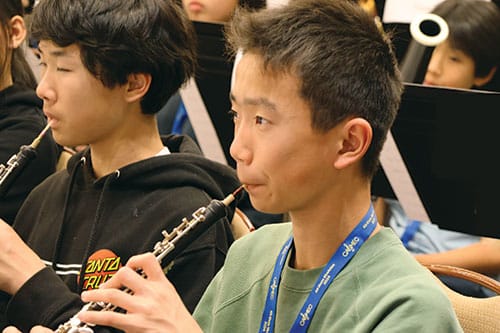
Whether students begin the oboe with no music background or transfer from another instrument, there seem to be four common problems they all face – breath control, embouchure, tonguing, and hand position.
Breath Control
When working with beginning oboists, the first fundamental to stress is strong breath support. Even those who have played another woodwind instrument find the oboe demands more control of the breath than they expected. Be sure students have a clear idea of diaphragmatic breathing. It is helpful to observe a sleeping dog or person to see what correct breathing looks like. Students seem encouraged when I tell them that everyone breathes correctly when asleep. Good breath control is something that all oboists, professional or otherwise, have to work on continually. The beginner works at developing it, while the professional tries to maintain it. Walking and jogging are particularly good exercises to strengthen breath support and keep the lungs in good shape.
Embouchure
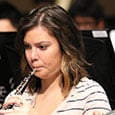
While correct breath control provides the foundation of oboe playing, a good embouchure focuses the sound. Many people feel there is something mysterious about the oboe embouchure, possibly because every oboist’s approach to the instrument seems so different. To the casual observer, it is hard to tell how much of the player’s lips are inside the mouth or exactly where the reed is placed on the lips. There are many differing opinions, but all good embouchures seem to be based on a common principle: cushion the reed with an air-tight seal while not dampening the sound excessively.
To encourage young players to develop a good embouchure, tell them to purse their lips to form the vowel sound “oooo.” This can be practiced away from the oboe as an isometric exercise to strengthen the lip muscles. Then, try to encourage them to develop an embouchure that looks and feels as much like that vowel sound as possible. They should get a feeling of the lips being out in front of the teeth. Some pressure from the reed on the lower lip is considered desirable, but the most common fault in fledgling embouchures is to bite down on the reed, making an embouchure that is simply skin-covered teeth. This always produces a tight, thin sound. The only way to achieve a full, round sound is to develop an embouchure that is round itself and encircles the reed with firm, yet flexible lip support.
The placement of the reed on the lips is also very important. If the reed is placed too far in the mouth, the resulting sound will be loud and harsh because the tip of the reed is exposed inside the mouth instead of being cushioned by the lips. This is how most beginning oboists play because it seems the most secure way to them.
Encourage students to play on the tip of the reed. At first, it feels very uncomfortable and seems hard to control. It is important to increase the breath support while trying to play on the tip because this helps to support the sound. Most students try to support the sound with their lips rather than to hold it up with the breath. This link between the breath and the embouchure is almost always overlooked and is the most common cause for a faulty embouchure.
An efficient and flexible embouchure will not look as though it is painful to the player. The lips will be rounded and the corners of the mouth brought around the reed. There should be a small amount of lip showing on the outside; otherwise too much lip will be obstructing the vibration of the reed inside the mouth.
The angle of the head is also important so the airstream can flow freely. Beginning students invariably seem to tuck their chins in and look down, cutting off the airstream slightly. Bad posture makes a difficult instrument like the oboe almost impossible to play. So tell students to sit up and look straight ahead as though they are proud to be playing such a beautiful instrument.
Tonguing
Perhaps the most outstanding characteristic of the oboe aside from its beautiful tone is its ability to play a crisp, incisive staccato. Clean articulation is probably more difficult on the oboe than the other woodwinds, but the results make all that practice worthwhile. The beginning oboist should start to practice tonguing by touching the tongue to the tip of the reed as if to say “tah.” It is essential to keep the airstream going strong and not to distort the embouchure at all. The airstream must remain continuous even though the tongue will be temporarily stopping its flow. Young players become very confused on this point and always stop the airstream in an effort to stop the sound. They have to learn to tongue “on the wind.”
Tonguing should first be practiced on quarter notes and then gradually sped up with the help of a metronome. Students should be encouraged to observe themselves carefully while practicing to avoid developing tension in the throat. Any kind of guttural throat sounds or feelings of tightness indicate a need to slow practice down and try to remain relaxed and open in the throat.
Hand Position
These first three fundamentals are the most important to a young oboist getting started on the instrument, but they go hand-in-hand with how a student holds the instrument. Generally, the arms are held slightly away from the sides of the body to accommodate the expanding ribcage. Those students who have transferred from clarinet will find this a little different but will adjust quickly. The oboe should be held at a 45-degree angle to the body and never rested on the knee.
A good hand position developed at an early age is vital for avoiding tension or cramps in the hands and to achieving a fluid and flexible technique. The oboe does not seem to be designed for a human hand. The keys are spaced irregularly, and the poor right hand thumb carries the weight of the entire instrument.
The most difficult aspect for students to grasp is the angle of the hands and the curvature of the fingers. Tell students to make the letter “C” with the first finger and thumb of both hands. The rest of the fingers should be in line with the first finger and curved comfortably. Then they should try to transfer this hand position to the oboe, maintaining the “C” curve in both hands. If students have any problems with the left hand, suggest rotating the left wrist to find the proper angle, the place where the hand will fall into that curve.
Very often young players try to curve their fingers excessively or hold them crookedly. It is helpful to take one hand away from the oboe, shake all the tension out of it, and place it back on the oboe in what feels to them the most natural relaxed position. Certain fingers are harder to keep curved on the oboe than others. The third and fourth fingers of both hands require constant vigilance. Because players’ hands are different sizes and shapes, students must experiment to find the most comfortable and efficient position for them.
These four fundamentals – breath control, embouchure, tonguing, and hand position – provide the basic keys that open the door to a successful start on the oboe. It is important, of course, that students have an adequate oboe and reed to begin to try to master these fundamentals. Before the first lesson, a good student instrument should be tested by a professional oboist or oboe specialist to be sure that all of the pads are covering and all of the screw adjustments are correct. Nothing is more frustrating for a student than trying to get a sound out of an instrument that would stymie even a professional.
The reed should be a long scrape reed, preferably made by a professional. Try to scout out oboists in your area who would like to supplement their income by selling reeds to you at a price that is comparable to the store-bought varieties. If you cannot find someone who is interested in selling reeds, then perhaps one of the oboists you contact could recommend a suitable commercial source. There are several brands which are adequate for the beginner, but short scrape reeds are entirely unsuitable.
With a playable instrument, a freely vibrating long-scrape reed, and your encouragement and advice, the beginning oboist will be off to a good start on a challenging instrument.
Photos by Kirby Fong