
Most beginning flutists learn in a classroom with other students studying various instruments. In order for all to play together, band method books became a popular solution for classroom management. While this is a noble cause, band method books focus primarily on notation and fingerings and should be supplemented with instrument-specific materials.
The first note taught in most band books is the Bb, and then they continue on with C, D, and Eb. This sequence of notes is one of the most challenging on the flute. Professional flutists struggle to keep the instrument still and well-balanced while executing these notes. They practice hours in a mirror to develop economy of motion. To prepare students for the challenge of the Bb, C, D, notes, many teachers opt to teach B, A, and G first. These notes may be played with the right hand on the barrel to stabilize the flute in the chin. Once the flute is stabilized with a good hand position, flute students can join the group working from the band method book with the right hand in playing position.
Once students have learned B and A, have them trill in quick spurts from A to B and then G to A. You may also introduce trilling starting on the top note too – B to A and A to G. At this time, mention that trills in band music will go up as in A to B, but in their solo music, especially the music of the Baroque and Classic periods, the trill may start on the upper pitch. In either case, the first note of the trill starts on the beat, not before. Muscles learn in chunks so playing a trill followed by a rest ensures that this information is put into muscle memory quickly.
 A to B and G to A quarter note trills
Since the fingers are not visible to the flutist when playing, start teaching trills with the end of the flute resting on the student’s knee so they may see what the movement looks like. Practicing trills in front of a mirror is also beneficial.
When playing a trill, the movement of the finger is executed at the third knuckle back from the nail except for the left index finger where the movement is done from the second knuckle back from the nail because the tube of the flute is resting just above the third knuckle.
To trill well and fast, the fingers must work efficiently with no extra motions. The movement of the fingers should not disrupt the embouchure or produce any movement in the headjoint or flute as a whole. The key is closed by the fleshy part of the tip of the finger. Nails should be short as when playing the piano or a string instrument. When lifting the finger, it remains as close to the key as possible. The arch of the finger is maintained throughout and the finger is not straightened when lifted. This playing position is what students should develop for playing all notes of varying lengths.
As each new note is added, introduce trilling to and from that note. Most trills are based on regular fingerings with the following exceptions. (Check a trill chart for these fingerings.)
C to D in the 1st and 2nd octaves
E to F# in the 1st and 2nd octaves
Ab to Bb in the 1st and 2nd octaves
B to C# in the 1st and 2nd octaves
The most common exception is the C to D trill fingering. This involves the use of one of the two trill keys. A good way to remember this is the first trill key is used in the first octave and the second trill key is used in the second octave. The question though is which finger goes on each trill key. To teach this rotate the fingers to the player’s left (towards the headjoint) with the F finger playing the Bb lever, the E finger playing the first trill key, and the D finger the second trill key. This usage of fingers is exactly the same as when playing the top octave Bb and B. Consistency means using the same finger on the key each time it is used.
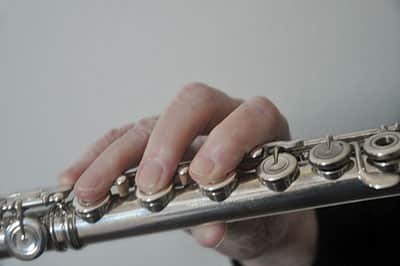
Right hand in regular position
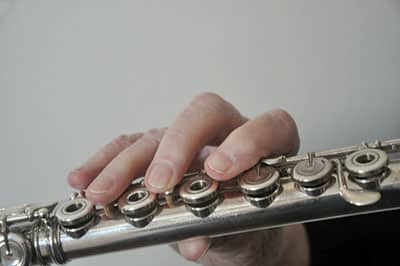
Right hand in auxiliary keys position
In addition to developing a good hand position, practicing trills can improve control of the musical line. Beginning instrumentalists often pulse with the air on each note they play. When trilling, many notes are played on one blow of air. This will eventually translate into playing several slower notes on one blow of air. Try using this concept with the first three notes of a scale ascending and descending while keeping the air stream constant. To do this well, students will learn that the air stream is separate from the fingering sequence. Later, move on to tetrachords, five note patterns and nine note scales.
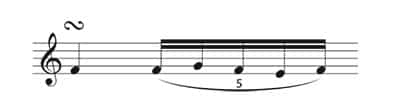
When building a technique, it is important to learn to move the fingers while keeping the tube of the flute still. For intermediate level students, playing one trill or a mordent on each scale step reinforces their knowledge of the trill fingerings, but also keeps the fingers light and ready to play. Remind students that mordents are played in a short, short, long rhythm – two sixteenths followed by an eighth note – not as a triplet.
 For more advanced students, playing gruppettos scales are a wonderful way to learn to balance the flute in the hands.
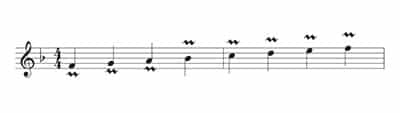
Introduce the concept of a gruppetto as a group of five notes starting on a pitch, moving up a note, returning to the initial pitch, then moving down a note and finally returning to the initial pitch as in F, G, F, E, F.
Playing a gruppetto on each note of a scale slurred teaches how to balance the flute. Trill keys are often employed in playing gruppettos in order to achieve speed and an even technique. Of course, if the trill key compromises the pitch, then the regular fingering should be used. Playing gruppettos as well as other scales patterns develops and reinforces the concept of which note might come next in a passage which in turn is helpful in sightreading. Gruppettos may be executed in three rhythms. Begin with rhythm 1 first and then no. 2. If the written gruppetto is written just after a dotted quarter, then use rhythm 3. 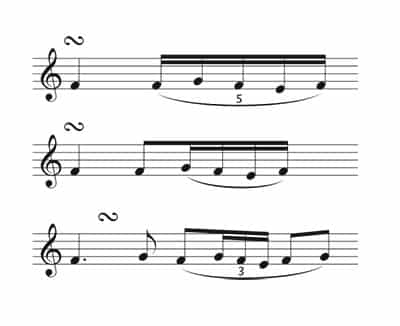 While younger students will probably not see gruppettos in their early repertoire, they may occur when playing Romantic transcriptions and in regional and state audition materials. However, practicing trills, mordents, and gruppettos are beneficial for developing an ergonomic hand position and air control. Plus, kids love playing these gestures.