There is nothing that drives me crazier than having a student sit in band without an instrument while it is being repaired. I am a certified band instrument repair technician with a repair shop in my basement, but I want to spend my days teaching rather than fixing every instrument that needs it; I became a band director because I love teaching, not fixing instruments. If I can spend no more than five minutes doing minor repairs at school to keep an instrument up and running, it is worth the time. If a repair is going to take more than five minutes or require tools that I don’t keep at school, I send it in for repair. I have a good relationship with my local music store, and if one of my students needs a repair, I send it there, but I also ask for loaners so my students can play in rehearsal rather than twiddling their thumbs.
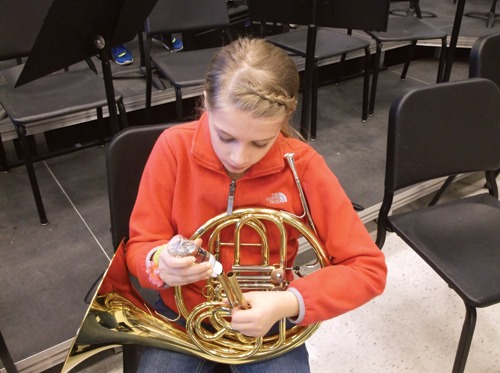
For brass and percussion repairs , the tools I keep on hand are screwdrivers, pliers, a few stem and cap felts, some waterkey corks, an old cut-off drumstick, an old rawhide mallet (chime mallet), a small rawhide mallet, a mouthpiece puller, French horn string, a waterkey spring tool, drum keys, snare and beater heads, slide grease, and valve oil.
Avoiding repairs is always preferable. If your trumpet students are like mine, they want to put their band folder in their case on top of the trumpet, which must not be permitted under any circumstances. Cases are built to hold a trumpet snugly. If a folder or lesson book sits on top of the trumpet it will push down on the high point of the instrument, which is the second valve slide. When this valve slide gets forced down, it makes the second valve stick. If this happens, it is possible to carefully (gently, fearfully) pull the slide back to where it belongs, but be careful not to pull it too far or it might come off completely.
For brasswinds, cleanliness is next to godliness. A clean mouthpiece plays better, feels better, and certainly smells better. I tell students to wipe their mouthpieces out with a clean, soft cloth after they use them. A mouthpiece brush used regularly will clean out the inside. If a mouthpiece is especially dirty or smelly, it can be put in a sink with warm, soapy water for a few minutes to loosen any debris, then students should use a mouthpiece brush on it.
At my beginning band parents meeting, I tell the parents never to try to unstick a mouthpiece at home with pliers. The average father is much stronger than a trumpet. As a technician, I have had to replace twisted mouthpipes and broken braces caused by well-meaning dads. I tell students to bring an instrument with a stuck mouthpiece to me, and I’ll pull it for free with my puller, which beats having to pay a couple hundred dollars for a repair that should have been avoided.
In my repair business, I always finish a repair by cleaning and polishing the mouthpiece and rerounding the shank using a mouthpiece shank mandrel in my bench motor and a rawhide mallet. I have tried to use a mouthpiece truing tool on my students’ mouthpieces at school but had little luck. In my shop I have a mandrel that I insert into my bench motor, which I use as a vise. The bench motor/mandrel combination gives me a secure holder to re-round the shank with my small rawhide mallet. If a mouthpiece shank is not too badly misshapen, as a teacher I choose to ignore it.
Giving a brass instrument a bath every month or two will prevent a build-up of what gunk in the instrument and also helps prevent red-rot (or de-zincification) in the mouthpipe and slides. I show my fifth grade brass players how to give their instruments a bath. If they give their instruments a bath regularly, they avoid many problems down the road, but if they fail to maintain the instrument, a chemical clean is needed.
The differences between giving an instrument a bath and a professional chem-clean (also known as a chem-flush or acid bath) are many. If the instrument is fairly clean, with good stem/cap felts and waterkey corks, then a bath is a great preventive choice. If the gunk in the instrument is solid and will not come off with a bath, then the acids in the chem-clean will loosen the gunk in order to remove them. If the felts and corks are worn, they need to be replaced, and that is part of a chem-clean. If slides are stuck or there are dents in the bell, fixing those is included in a chem-clean. Even with a monthly bath, it’s a good idea to chem-clean a brass instrument every year to keep the instrument playing well for a long time.
I provide bulk slide grease and valve oil for students. I buy a tub of the gold-color wheel-bearing grease from an auto parts store for $1.50 and put an acid brush from the hardware store with it to apply it to the slides with less mess. For valve oil I use lamp oil for $4 from a hardware store that I pour into little dropper bottles from the drugstore. By providing these I have fewer problems with sticky valves and stuck slides. I also do not have students asking to borrow either of them, because both are readily available.
I have the piston brass players oil their valves by pulling them out, one at a time, so only a half inch of piston is showing. Five to six drops of valve oil on the piston is plenty, and it is unnecessary to spin the piston because the oil wicks around and covers the whole piston. Also, if students do not twist their piston while oiling, they don’t have to struggle to find the groove for their valve guide and can put back in the casing without much aligning or turning. Piston brass players should oil their valves before they play for the first time each day.
Rotary valves should be oiled in two different ways. The rotor face can be oiled by taking out the valve slides. Put five or six drops of rotor oil down the middle of the valve slide tubing closest to the rotor. Another option is to put the oil in the valve slide and then replace the slide and let it run onto the rotor face. This method works best if the valve slides are clean. The spindles should be oiled with a heavier oil in a needle-applicator bottle. Put a drop or two in the space below the stop-arm and on the other side under the cap where the spindle moves in the back plate.
A stuck valve cap is a sign of lack of use. Bottom valve caps never get stuck if you put a little slide grease on the threads after you clean the instrument. If they are stuck, I lightly and gently tap them at a 45-degree angle with my small rawhide mallet in the direction I would unscrew it. Like tapping a stuck jar lid with a butter knife, the rawhide mallet loosens corrosion and debris that can make a valve cap stick. If a cap will not loosen, avoid temptation to use pliers. Just send it in for repair.
A stuck valve that won’t move after being cleaned and oiled may have a dent in the valve casing. This is a job for professionals. If the valve sticks, do not force it. One band director once brought me a baritone valve with an interesting screwdriver-shaped hole in the bottom of the valve. I could have repaired it if it had not gone right up into the ports of the valve. If you must get a valve out, unscrew the top and bottom valve caps, then gently tap on the bottom of the piston, lightly striking a cut-off drumstick with a small rawhide mallet. If it still sticks, don’t force it. Send it in and have a qualified repair technician get it out.
Stuck rotary valves can often be freed by oiling the rotor face and both spindles, then working the stop arm back and forth until they can be moved with the key. Sometimes a rotary valve gets so corroded that it needs to be chem-cleaned before it will move again. Let a repairman do that. Loose valves that rattle also need a professional’s gentle touch.
Trombone slides can be a great source of irritation to directors and students alike. If a student moving his slide makes a sound, the slide needs attention. First, keep the slide clean. Giving the trombone a bath will keep it moving well. After giving the trombone a bath and cleaning the inner and outer slides with a flexible cleaning brush (snake), have trombonists wipe out the inside of the outer slide with a trombone rod wrapped with a four inch wide piece of sheet or cheese-cloth.
If a trombone is dirty to start with, have it chem-cleaned by a professional. Additionally, the barrel corks and felts, waterkey corks, and the rubber bumper tip should be replaced. I also remove accessible bell dents and do basic handslide repairs.
I cannot stand playing a trombone with a dent in the slide; it makes the instrument extremely difficult to play. Have a repair tech raise the dents and align the slide. It is well worth the expense to have a trombone that is fun to play again.
Broken braces and solder joints should be sent in for fixing. A little masking tape is okay for an emergency but makes a sticky mess if it’s left on for any length of time. Never superglue a broken soldier joint. It won’t hold anyway, and it gives off noxious fumes when heated by the technician who has to remove it before he can resolder the joint.
Percussion repair for me, as a director, consists of replacing snare drum batter and snare heads. For this I keep a couple of 14" concert drum heads (batter and snare) as well as a set of 13" marching heads. I have two drum keys: a regular one and one with the arms cut off and ground down so it will fit in my electric hand drill. I use the cut-off drum key for fast and dirty removal and replacement of heads. I use the regular drum key for fine adjusting. I also keep a spare snare and some marching lugs.
The ball-end on my 5th graders’ bell mallets always seem to fall off. I keep a tube of superglue gel handy to put them back on.
Links
Oiling piston valves: www.youtube. com/watch?v=oyV4M5nxISM
Oiling rotary valves: www.youtube. com/watch?v=QF1LMaZNlF0
Additional information on instrument care and maintenance: www.redwingmusicrepair.org/band/resources.html and www.napbirt.org (click on the resources link)
How to Give a Trumpet a Bath
Tools needed:
two old towels
dishwashing detergent
paper towels
a cup
a flexible cleaner
a valve brush
valve (or slide) cleaning rod
two handkerchiefs or pieces of old sheet
a mouthpiece brush
valve oil
slide grease
First, put an old towel in the bathtub. Put about four inches of warm, not hot, water in the tub. Add a few drops of dishwashing detergent to the water – enough to make suds. Take some of the soapy water in the cup. Set the cup on a paper towel.
Remove one valve, wipe it off with a paper towel, put it in the cup of soapy water. The water level in the cup should be high enough to cover the piston but not so high that it wets the stem or cap felts. Repeat this with the other two valves. Remove the bottom caps, wipe them out with a paper towel, and put them in bathtub.
Remove each slide, wipe them off with the dirty paper towel, and carefully place the slides on the towel in the tub.
Wipe out the valve casings and outer slides. Carefully place the trumpet body in tub. Put the mouthpiece in tub.
Scrub the valves with valve brush. Rinse and dry them, then and set them aside.
Scrub the trumpet body and valve slides with a valve brush and flexible cleaner, then rinse and dry. Wipe out valve casings with the rod and clean cloth. Scrub, rinse, then dry the mouthpiece and set it aside.
Put grease on the slides and threads. Reassemble the slides and bottom caps. Oil the valves and reassemble the rest of the instrument.
Clean up your mess.