Starting a beginning violin or viola player can be a daunting task. The mechanics of holding the violin and bow are tricky, especially for younger students. Experienced string teachers have developed a variety of techniques using inexpensive tools that set up the instrument in ways that make this difficult process easier and more fun for students.
Setting up the bow and right hand
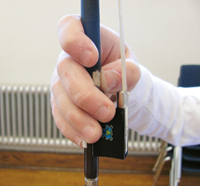
 On violin and viola it is generally easier to start with a beginner bow hold. Students should place the thumb on its tip under the frog instead of on the stick, so the hand will form in a more open shape and not collapse and grab the bow.
 Many teachers use a story to teach this bow hold. An easy one to remember is based on a family of bunnies who live on the edge of a lake. The bow is the dock with the bent thumb a shark sitting in a chair waiting to tickle the feet of the twin bunnies (middle two fingers) that hang their feet in the water as they gently tickle the frog that lives on the dock. The daddy bunny (pointer finger) hugs the dock, and the baby bunny (pinky) stands in his playpen watching. Mommy bunny is in the bunny cave (open curved hand) making peanut butter sandwiches.
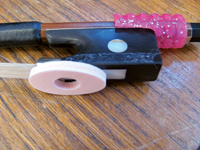
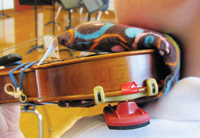
Because students often have difficulty keeping the thumb curved while they play, place a corn pad on the bottom surface of the frog. This gives them a secure place to put the tip of the thumb.
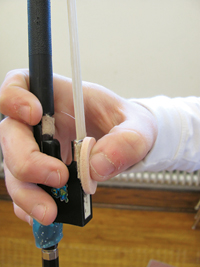
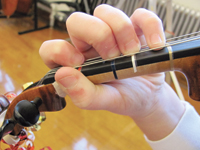
 To assist a young player with the pinky finger on top of the stick, cut approximately 1⁄3 off the end of a gel pencil grip and then cut a small rectangle from one end of the larger section. Slide the end with the slit over the stick as shown left.
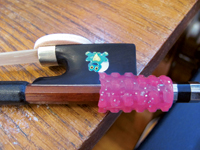 A frog sticker placed on the side of the frog where the fingers hang over will help the beginner remember to gently tickle the frog rather than squeeze it.
Once students can keep the thumb bent under the frog, they can switch to the regular bow hold. Here the thumb is placed between the frog and the winding. To help students make this change, place a small piece of moleskin at the thumb position. As students become more comfortable with the bow hold, you should also replace the gel grip with another small piece of moleskin placed approximately over the middle of the frog.
Students should practice bow exercises at home to strengthen the bow hold. One exercise is the “Up Like a Rocket” song, which is often sung to the melody of Twinkle.
Students should practice bow exercises at home to strengthen the bow hold. One exercise is the “Up Like a Rocket” song, which is often sung to the melody of Twinkle.
Up Like a Rocket
Up like a rocket, down like the rain
Back and forth like a choo-choo train.
‘Round and ‘round like the great big sun
Up on your head with a smiling thumb
Check your pinky, check your thumb,
Playing strings is so much fun!
Students can also write their names on the floor or spell words using the screw part of the bow. While they pretend to write with the end of the bow, they should focus on a correct bow hand position and hold the bow vertically to avoid undue pressure on the pinky.
Posture
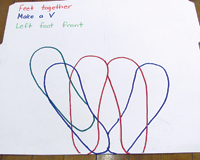 Before students learn to hold an instrument, they should practice the proper standing position. (This step is particularly helpful for younger students who have trouble staying still for extended periods.) A foot chart made from a legal size manila folder can be used to help the violins and violas.
 Another rhyme sung to the tune of Lightly Row, can help the students remember the steps to stand properly and then bring the instrument to the shoulder when they practice at home.
Rest position, monster fingers
Feet together, standing tall
Make a V, then left foot front
Balanced body so we don’t fall!
Left arm out – stop sign – go
Violin headstand – straight as can be
Up on my shoulder, holding strong
Look ma, no hands! – Yeah for me!
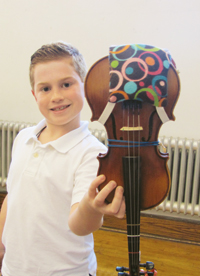
The following photos refer to the lyrics of the set-up song. Students start in rest position with violin tucked under the arm. Then the left hand holds the violin with the fingers curved on top of the instrument and the thumb curved and under the instrument. The left hand wrist should be straight (rest position, monster fingers).
Then while still holding the instrument with the left hand, the student extends the arm straight out so that it is parallel to the floor directly over “left foot front” (approximately half way between straight out in front and straight out to the side).
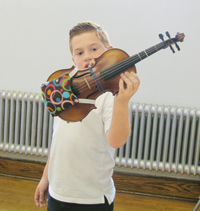
The next step is to rotate the instrument upside down (violin headstand – straight as can be) while swooping the instrument inwards toward the student’s body and up on the shoulder. The head will tip slightly so the left side of the jaw rests on the chin rest or chin pad.
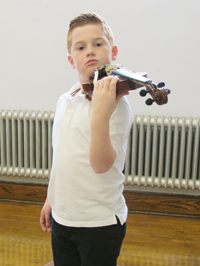
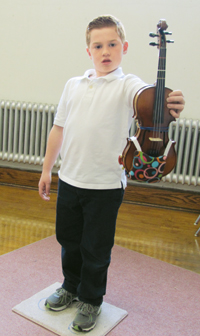
The final step is to drop the left hand and demonstrate the proper positioning of the instrument. If it is held properly, students should be able to hold the violin without holding it with their hands (look ma, no hands).
Chin and Shoulder Rests
Students and instruments come in a variety of shapes and sizes, and a fair amount of adjustment is necessary so students can hold the instrument comfortably and play the instrument properly. If a student cannot hold the violin securely, it may sag as he plays. This leads to poor placement of the left hand fingers and the as a result intonation problems, and difficulty bowing correctly.
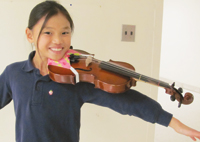
All violin and viola students should have a shoulder rest of some kind. For beginners a commercially-made combination chin pad and shoulder rest often works well. These are available from most online string supply places or can be made inexpensively by the teacher. The advantage of a combination chin and shoulder pad is that additional padding can be slipped in between the pad and the shoulder, at the end of the violin, or by the chin rest. Some students find that a center chin rest is a better position. One option is to remove the regular side chin rest and add a small piece of ½" or 1" foam on the top of the violin to serve as a center rest. The following picture shows a student with a chin pad that serves as a center chin rest on the top of the instrument and a commercial shoulder rest under the violin.
Tapes
While there are some teachers who dislike finger tapes, they are a helpful aid as students develop their listening skills and learn the many other aspects of playing a string instrument. Tape violin and viola fingerboards for all four fingers (using the major tetra-chord spacing – B, C#, D and E on the A string for example). A color code for the tapes will help teachers with large group classes as students can be told to make sure “first finger is on the red tape.”
Car striping tape works well for taping instruments as it is thin and comes in many colors. Color-coded tapes should not be used to teach note reading, however, as it is important for beginning students to learn the relationship between note names and finger placement on the strings.
A small piece of moleskin on the neck helps the student with thumb placement. The teacher can then simply tell the student to place the thumb on the “fuzzy tape” with it pointing up to the sky. This gives the student both a visual image (pointing up) and a tactile reference for accurate thumb placement.
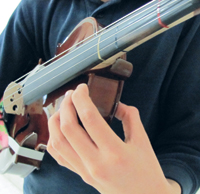
 Bow Tapes
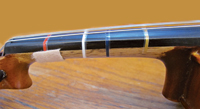
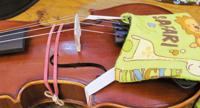
 To assist beginners with proper bow distribution and a good tone, put colored tapes on the bow to mark the sections of the bow that should be used. For example, put a green tape at the frog end and a red tape approximately 5" more toward the tip. The tapes can also serve as go (green at the frog) and stop (red nearer the tip.) The green tape should be placed at the point of the bow where the student’s arm makes a square with the violin which will generally be slightly below the balance point of the bow.
Once students are ready to use more bow length use a different color at the ends of the bow to mark the new length for longer notes, as shown with the yellow tapes in the previous picture.
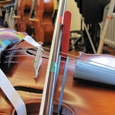
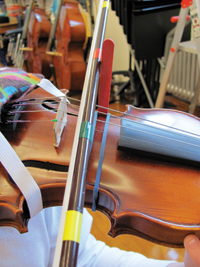
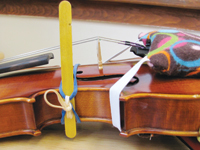
Students often have trouble pulling a straight bow between the bridge and fingerboard. Teachers often tell students to keep the bow on the highway or railroad tracks to produce a better tone. A large rubber band can be tied around the violin to form a visual railroad track or a road to guide the beginner’s bow.
If a student still has trouble maintaining a straight bow, put a popsicle stick or pencil in the spot where the rubber band is tied together. This forms a barrier that the bow can move beside. (This can be seen in the picture under bow tapes.) The pencil is held in place by a smaller rubber band.
.jpg)
These simple yet effective set-up suggestions will help young violin and viola students overcome some of the common initial position and posture difficulties. This allows them to quickly focus on learning to play and create music.