Last month we discussed how our recruiting program is organized at Creekside Middle School and how we assess potential percussionists for the program. In this part, we discuss recruiting efforts for the woodwind and brass instruments.
Flute
An effective technique for getting an initial sound on flute during the instrument fitting is to have the student place the index finger horizontally below the bottom lip and pout over the finger. This will be more effective if the tester demonstrates before having the student attempt it. Have the student blow air as if saying the word pooh.
Once the student can do this correctly, remove the finger and replace it with the flute headjoint. It is crucial that the tester place the headjoint in the proper location. The tester will guide the student in playing on the headjoint only and circle the appropriate descriptors on the form regarding embouchure, ability to sustain a tone, and sound quality. Have the student attempt to produce low and high sounds on the headjoint with both open and closed ends. A final step would include showing how to hold the flute and checking hand and finger size, as well as arm length. I do not always have students attempt to play on the full instrument, as many will not get much of a sound, but if you find one who can, you may have a great candidate.
For potential flute players, you will want to watch for a teardrop lip, which results in a split air stream. Despite popular belief, it is possible for students to play flute with a teardrop, but it requires an adjustment of their embouchure, typically playing with the aperture pulled to one side. If you plan to start a student with a teardrop on flute, do your homework or bring in a flute specialist to set the player up for success. Braces and double jointed fingers can cause problems for young flute players, but unless severe, these are usually manageable.
Double Reeds
Not all programs start students on double reeds, but I highly recommend it. There is no reason that a motivated young musician cannot achieve success on oboe or bassoon. It is relatively easy to get an initial sound on both instruments, so you will want to consider other factors as you narrow down candidates. These include intelligence, musical aptitude, motivation, and parental support. For bassoonists, you will also want to make sure the child is big enough to hold the instrument, reach all the keys and tone holes, and carry the case back and forth to school.
A simple way to create an embouchure on double reeds is to place the reed on the student’s lower lip and then have them roll both lips in over the teeth. Ask the student to make a seal so air cannot escape, (but don’t squeeze too hard) and blow. Once the student can produce a steady sound on the reed, add the full instrument. On oboe, I typically turn the instrument around so that I can finger the notes while the student blows. On bassoon, I show the student how to place the thumb on the whisper key and where to add fingers 1-6 one at a time. I use a synthetic reed for double reed instrument fittings to make sound production a little easier for the student. Don’t forget to have the student use a seat strap when trying bassoon.
Single Reeds
Braces tend to be of less concern for clarinet and saxophone players, so consider these instruments if a student will have to spend a lot of time getting orthodontic treatment. Try to avoid placing a student with double jointed fingers on clarinet as they often will have a difficult time covering all the holes. Likewise, a student with thin fingers may struggle with clarinet technique. Saxophone is one of the easiest instruments on which to get a sound, and one of the most popular. I will ask any student trying saxophone to consider clarinet to help keep numbers down. I do not recommend using a hard reed during saxophone fittings as a method of discouraging students from playing this instrument, as you will wind up with students prone to forcing the sound. It is better to use a #2 or #21⁄2 reed and look for students who can maintain a relaxed, steady airstream.
Both clarinet and saxophone embouchures take some work to create, but I have found the following techniques work at instrument fittings.
1. Have the student place an index finger in the center of their lower lip.
2. For clarinet: Push the bottom teeth toward your finger to create the correct shape of the chin.
3. For saxophone: Push the finger toward the teeth.
4. Have the student remove their finger, but keep the same shape to the lower lip and chin.
5. Tester should place the mouthpiece in the proper location on the bottom lip.
6. Have the student put the top teeth directly on the mouthpiece. Many students will have difficulty with placing the top teeth with the correct amount of pressure. In this case, I will have them pretend to use their pinky finger as a mouthpiece and place it as described above. Have them bite on their fingernail, but not so hard that it hurts. The student should not bite any harder on the mouthpiece than they would on their finger.
7. Ask the student to close the lips around the mouthpiece as if they are closing a drawstring bag and blow a steady, fast air stream. Always set up the clarinet embouchure using mouthpiece and barrel and the saxophone embouchure using mouthpiece and neck.
Once the student can produce a steady sound for 3-5 seconds, add the rest of the instrument. As with oboe, I will turn the mouthpiece around on clarinet so that I am fingering the notes and the student is blowing. With saxophone, I place the neck strap on the student and have the student do the fingering. This is a way to challenge potential saxophonists and keep your numbers manageable.
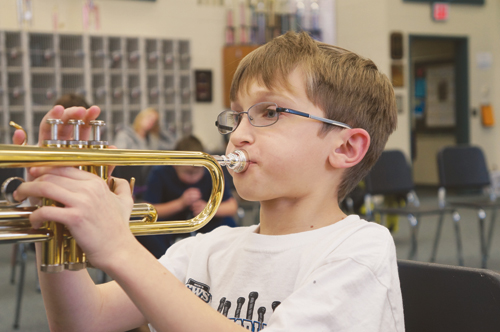
Brass
Trumpet is always a popular choice, but many students have an easier time getting a sound on a low brass instrument. If a student is not successful right away getting a sound on the trumpet mouthpiece, then try a trombone/baritone mouthpiece and often you will find that this is easier. You can then continue to try low brass instruments, or go back to trumpet and try it again once the student has achieved some success on low brass.
Many of my low brass players came to the instrument fitting appointment with trumpet in mind, but found that a trombone, baritone, or tuba was much more comfortable for them. This is what the instrument fitting is all about – finding the best match for the student. Don’t be afraid to use your knowledge and expertise to guide the process. Likewise, if you have a student who does well on the trumpet mouthpiece and seems intelligent and highly motivated, try horn.
As with all the other instruments, try students on the mouthpiece initially and then move over to the full instrument. Some teachers advocate buzzing on just the lips first. After approaching brass fitting in this way for a number of years, I no longer use this technique because I believe that it creates tension. However, both techniques are widely accepted, and you should use the method you believe works best. Below you will see my approach.
1. Have the student wet the lips
2. Ask the student to say m to close lips naturally and then practice blowing air through the lips
3. The tester should show the student where to place mouthpiece on lips (2⁄3 to 1⁄3 ratio for horn, centered for all others)
4. Have the student hold the shank of the mouthpiece with a thumb and two fingers and then place the mouthpiece on the lips as you demonstrated
5. The student should then blow air in the same way through mouthpiece, gradually bringing the lips closer together until vibrations are created
Once the student can produce a steady sound on the mouthpiece for 3-5 seconds, add the rest of the instrument. Show the student how to hold the brass instrument correctly, supporting it with your hand if necessary, and allow them to create sounds. Guide the student in getting various partials if they are able. On trombone, make sure to take a moment and have the student extend the slide to see how far they can reach. Do not rule out trombone if the student is unable to reach a true seventh position, as the student will grow over time.
As with all the other instruments, the tester should make notes on the form as to what the student was able to accomplish.
Guiding the Process
As you take the students through the instrument fitting process, do not be afraid to guide them toward other possibilities. As the professional, it is your responsibility to try to place the student on an instrument that allows for success, while at the same time working to balance your instrumentation. Let’s revisit a few ideas:
• Weak sound on trumpet – try low brass.
• Great sound on trombone or baritone from a tall student – consider tuba.
• Great sound on trumpet from a motivated and intelligent student – try the horn.
• Too many saxes – suggest clarinet.
• Intelligent and motivated student interested in woodwinds – double reeds.
• Successful at many instruments and highly motivated – sell the instruments that the program needs
Summary Information
I find it helpful at the end of the instrument fitting appointment to have a summary from the tester. Because these forms are only seen by me and my staff (and not the student or their parents), I encourage my testers to be honest.
This section of the form alerts me to warning signs that might limit student success on a more difficult instrument like horn or double reeds. I can also watch that I do not overpopulate any one instrument section with attention-challenged students.
However, the most important information from the tester is where I get an overall picture of each instrument tried. I revised this section of my form after reading Chip DeStefano’s chapter in the most recent Teaching Music Through Performance in Middle School Band edition. The 1-4 rating was a big improvement from the system I was previously using, and produced consistent information that compared how a student did on various instruments.
Sign Out/Exit Interview
Once the students have tried a variety of instruments and the testers have collected notes, the student and parent go through an exit interview. I usually have band parents conduct this sign out procedure, although you could do it yourself if time permits.
Students receive a sign-out card in their packet when they arrive. This card allows the student to state the instruments they liked best and found comfortable to play. It is important that they complete this form after the instrument fitting, as many students change their mind about what they like after playing on the instruments. In addition to ranking first, second and third choices, I also ask students to rate how much they liked each instrument on a scale of 1-10. At the bottom of the card is also a place to tell me if there are any instruments that they are not willing to play.
This information is particularly helpful as I make recommendations and work to balance numbers. If a student performed equally well on trumpet and clarinet and rated those instruments 10 and 9 respectively, I can probably place that student on clarinet if I needed without much complaint. On the other hand, if trumpet was rated 10 and clarinet rated a 2, I know the student would be unhappy with a clarinet recommendation.
The orchestra director, Becky Sendi, and I go through notes to place students where we they can be most successful considering the following information in order of priority: student preferences, likelihood of success, and instrumentation needs.
Once all students have been placed, we send individualized emails to each family, again using the mail merge feature, and invite them to participate in the music program on the instrument we recommend. Sometimes a family requests a different instrument placement from what we have recommended, but this is a small percentage of students.
Final Thoughts
A highly organized recruiting and instrument fitting process can do wonders for your ensemble. I firmly believe that getting kids on an instrument they love and can succeed with will accelerate their musical achievement. Through your expert guidance and care during this important process, you can help your program to blossom.
Materials discussed in this article can be downloaded from Higdon’s website at www.onandoffthepodium.com.