In the competitive world of college entrance auditions, a growing number of schools are accepting video auditions. Videos offer some distinct advantages over audio CDs; viewers can observe the applicant’s posture, hand position, and embouchure, and with videos you cannot edit out mistakes with the same ease as audio files. This offers a truer picture of the applicant’s abilities.
In spite of these advantages, it is always better to play a live audition if possible. The audition committee will be able to interact with you, and live playing better conveys your sound and expressiveness. However, there are many valid reasons to submit a video audition: it may be required as a pre-audition screening, there may be scheduling problems, or you may simply live too far away from the school.
Preparation
Prepare your materials as thoroughly as you would for a live audition. Even though a video means that you can record a number of takes and choose the best one, recording can create almost as much pressure as a live performance. The audition committee will assume that you have recorded a number of takes to achieve the best performance, and may expect an even higher level of performance than in a live audition, where there is only one chance to play your best.
Check deadlines and audition requirements and make sure the video is received by the due date. Audition committees will meet shortly after that date, and must have time to watch the videos beforehand. If particular repertoire is required for the live audition, make sure that to include it on the video.
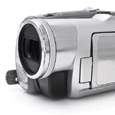
Equipment
The most important element of the video is sound quality. While colleges don’t expect you to hire a professional videographer, a video should convey tone and dynamics accurately. Many home video recorders don’t handle instrument tone well, especially when used in small, low-ceilinged rooms. Make practice videos with the equipment, preferably in a large room. Experiment with the different microphone settings available on the recorder, such as a Zoom microphone or noise reduction. If the recorder has a setting that equalizes dynamics, sometimes called “automatic gain control,” turn it off, so the committee can hear the full dynamic range. These videos will allow you to practice the recording process and assess how well the camera records the tone. If the sound on the video does not represent your tone accurately, borrow, rent, or buy better equipment. Video cameras offering an external microphone input will allow you to use a better quality microphone than the one built into the camera. However these cameras tend to be more expensive. Your school may own good video equipment, or a community TV station might have a professionally equipped studio where you could record your video. Do not record audition videos with basic equipment, such as a cell phone.
Format
A video audition is no good if the audition committee cannot play it. Edit the videos in a computer file format that will play well on a variety of players, not just your own computer or Smartphone. Videos recorded in QuickTime often do not play well on PCs; videos recorded in Windows Media Video may not work on Macs. Use a program that makes movies, not data encoded DVDs. For the Mac platform, the recommended program is iMovie, which is available at the iTunes Store. For PCs, use Movie Maker, which is a free download from Microsoft’s website. Movies made with these programs will play on a wide variety of players.
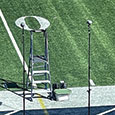
Recording Space
In choosing the room you will record in, consider the acoustics, background noise, and how the room will look on camera. Look for a large room with a high ceiling. This could be a band room, an auditorium, a large classroom, or a house of worship. Consider the amount of background noise bleeding into your room – the microphone often hears things the ears simply ignore. The audition committee will not expect the absolute quiet of a commercial recording session, but sounds from others practicing, traffic, airplanes, or loud ventilation systems should be avoided. Make sure the visual background is neutral: a tangle of chairs or music stands, or religious imagery, will detract from the professional image you want to project. A clock on the wall behind you tells the committee exactly how much time you spent recording – and that is information you want to keep to yourself. A highly personal space, such as a dorm or bedroom, is not appropriate.
Recording Session
Dress appropriately and wear something similar to what you would select for a live audition. Show the committee that you are respectful and serious about this audition. It does not have to be formal concert wear, but avoid extremely casual clothes, such as jeans, t-shirts, or shorts.
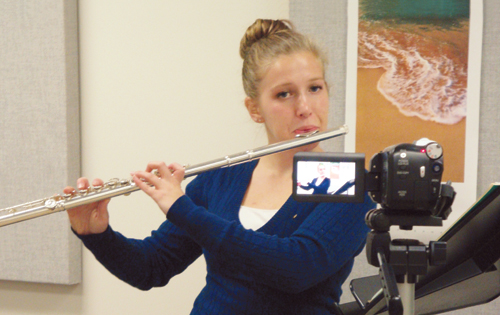
Record as many takes as necessary. Make sure that there is plenty of time to record. When you try to cram a recording session into a short space of time, it makes you feel pressured and nervous. Use a tripod or put the camera on a level surface so the picture is stable. Start by recording and playing back a few test takes to check the sound and picture quality.
The audition committee prefers to see the entire body in the picture, so that they can assess posture and playing position. Make sure that your embouchure, hands, and arms are visible in the picture and not hidden by the music stand.
Record as many takes as you feel necessary for each piece. Each selection should be recorded in one complete take, without editing. It may be helpful to start by recording the most difficult pieces first while you are fresh. While it is possible to record yourself, it may be easier and more efficient to have someone else run the camera and provide feedback. Since this is not a blind audition, it is acceptable to talk on the video to introduce pieces. Make sure you pronounce piece titles and composers’ names correctly.
Preparing the Final DVD
Watch all of the takes and choose the best recording of each piece. If you have recorded yourself, trim off the beginnings and ends that show you walking towards the camera, or any other unnecessary frames. Do not attempt to edit out mistakes. Save the files in the highest quality possible.
Make each copy from the original, not from a compressed file; every time you compress a file it loses quality. For example, a file that has been compressed for video streaming will not be high enough quality for a DVD.
Rename each file with the title of the piece, so the committee can tell at a glance what piece each track contains. Also, if you do not rename the tracks, the numerical file names the camera assigns will tell everyone exactly how many takes you recorded.
Burn the final choices to a DVD-R (as opposed to a DVD+R). Make labels for both the DVD and the case with your name, instrument, program you are auditioning for, pieces, and the format it was recorded in. Finally, play the DVD all the way through on a variety of equipment. The committee may play the DVD on a DVD player, Mac, or PC. If a DVD only plays well on one type of equipment, the committee may not get a clear idea of your playing. Mail the DVD in plenty of time to reach its destination by the deadline.