Throughout the history of the oboe, popular rhetoric has assessed it as “an ill wind that no one blows good” as well as the most difficult instrument to play. Truthfully, there is nothing more difficult about playing the oboe than any other instrument, but because most directors have first-hand experience with poor-sounding oboes in rehearsals and concerts, they are reluctant to have these “ill winds” in their ensemble. Some avoid teaching the instrument altogether. Learning how to troubleshoot typical problems associated with oboe playing and reed making can reduce frustration for both directors and students.
Identifying Problems
There are a large number of variables that confront oboe players. These variables include tenon cork fit, bridge alignment, adjustment mechanism, rods and keys that bend, condensation, grime, cracks, and most notably, the double reed; and a lot can go wrong with each one. For directors who have little experience with the instrument, figuring out what is going on with a malfunctioning oboe can be frustrating. Here are some reasons why oboists might struggle and why some notes may simply not work.
Tenon Cork
A firm connection between the top joint and bottom joints of an oboe is important for the instrument to function correctly, but unfortunately the tenon cork that makes this connection can easily compress and wear down over time. Even if the instrument is not played much, the tenon cork can lose moisture, causing it to shrink. When the top and bottom joints lack a firm connection, the instrument wobbles while a student plays it, causing the adjustment mechanism to shift and make many notes unplayable. This problem typically comes and goes as the connection shifts in and out of position.
To check an oboe for this connection, first assemble the instrument. Next, hold the bottom joint firmly and push the top joint forward and back. There should be no movement between the joints. If there is movement, the tenon cork should be repaired. For temporary help, cut a small piece of paper the same width and length of the tenon on the top joint and wrap it around the tenon. Carefully reassemble the instrument while watching to be sure the paper does not shift off the cork. The paper will degrade quickly, so this technique is good only as a short-term solution to the problem.
Adjustment Mechanism
When looking at an oboe, the amount of key work can seem astonishing. The mechanism of the oboe is constructed through relationships between what are called primary keys and secondary keys. After a player depresses a primary key, secondary keys move up or down as well. The relationships between primary and secondary keys are regulated through minute turns of various adjustment screws. Even the slightest imbalance between the primary and secondary key relationships can cause notes to sound fuzzy or to not sound at all. Difficulty producing low notes or a delayed response to articulation can indicate that the instrument is out of adjustment.
Learning to adjust an oboe is a useful skill that takes some patience and the help of an oboe adjustment guide. Several excellent editions of these publications are available, such as A Method for Adjusting the Oboe and English Horn by Carl Sawicki or Oboe Adjustment Guide by J. Patrick McFarland. When working through this process, turn the adjustment screws in tiny increments, the distance equivalent to about one minute if you are looking at the face of a clock. Do not allow young students to adjust their instrument without help, because they do not have the fine-motor skills necessary to do this.
Bridge Alignment
For the adjustment mechanism to function correctly, the bridge key on the right side of the instrument should be perfectly aligned. After the right side is aligned, the left side might be significantly misaligned. Misalignment on the left side is fine and will not have any mechanical effect.
Fragile Mechanism
The key work and mechanism of rods and posts on oboes are extremely sensitive to pressure. Keys are prone to bending, so players have to handle them with care, avoiding unnecessary pressure or stress. When assembling the oboe, grasp only the primary keys and avoid touching any rods. Lubricate the tenons and the reed cork with cork grease and then assemble the instrument using only gentle pressure. When resting the oboe on the lap or any surface, keep the keys facing up, and do not allow the instrument to rest on the group of keys on the left side (low B and Bb, Ab, left F, and left Eb). This part of the mechanism is particularly prone to bending and damage.
Condensation
Tone holes easily trap condensation, which then accumulates in the vent holes on the side and back octave keys of the oboe. These holes are closest to the top of the instrument where the air is the warmest and moistest. Accumulated condensation can cause a gurgling sound or a note to speak in the lower octave.
If a student has any difficulty playing in the second octave, blow strongly across the octave key tone holes at the top of the instrument. Ungummed cigarette paper is helpful to whisk away moisture. If octave condensation is frequently a problem, ask an oboe repair technician to remove and clean the octave vents. Condensation can accumulate in other tone holes and will sometimes greatly affect the pitch. An F might sound an E and a C might sound a B.
Swabbing
 Consistent swabbing of the instrument with silk pull-through swabs removes condensation so it does not accumulate. Some oboists avoid swabbing because they think the swab will get stuck inside the instrument. To avoid this, hold the oboe upside down and drop the weighted end of the swab through the bell. Gently shake the oboe until the weight comes through out the top joint through the reed well. Slowly pull the swab through the instrument and watch the entire length of the swab as it enters through the bell so that it does not twist or knot. Once the swab is inside the instrument, you can pull it more quickly.
If the swab suddenly becomes more difficult to pull, stop pulling immediately. Take the instrument apart and gently pull the swab back toward the bell. If the swab does not move easily, do not pull on it. Instead, directors might try a thin and smooth metal rod to push it out. If the swab seems tightly stuck, then take it to an instrument repair technician.
The oboe should be swabbed after every time it is played. Sometimes students with plastic oboes mistakenly believe that only wooden oboes need to be swabbed because plastic does not crack, but it is equally important to swab a plastic oboe to remove condensation and reduce grime.
Grime
Accumulated grime may prevent an oboe from working correctly. Look down the bore of the instrument and check to see whether it is smooth and shiny. A rough appearance means there is grime that needs to be removed with a swab. Sometimes so much grime accumulates that it collects in the tone holes and makes certain notes out of tune or altogether absent. After swabbing a filthy instrument, wash the swab in warm water with a mild detergent. Open up the swab so it is flat and can air dry on a flat surface.
After many summers of teaching at middle school music camps, I have learned to always look down into the bore of an instrument for dirt before volunteering my best swab to a student. The amount of grime waiting to be removed can be staggering. When an instrument is loaded with grime, I talk to the parents of the student about cleaning or swabbing it at home. Never use any kind of liquid to clean an oboe, because it will cause damage to the cork and skin pads.
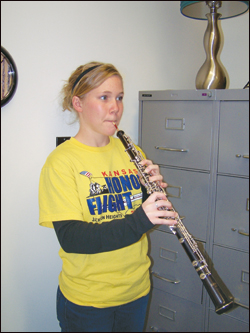
The Top-Joint Suction Test
The top joint of an oboe should be free from cracks and warped pads for the instrument to function correctly. To test for this, take the top joint and press down the B, A, and G keys with the left hand; next place the palm of the right hand firmly across the opening of the tenon and suck all of the air out of the top joint, forming a tight seal between the upper lip and the palm of your hand. Ideally, this seal should hold for at least seven seconds. If the suction is weak, a pad could be cracked or warped, or in the case of a wooden instrument, a crack could be present. Wood oboes that have cracked should be immediately repaired by an oboe repair technician.
Students should not attempt to play a cracked instrument, because the air flow and condensation can cause the crack to expand and immediately become more severe. Cracks are often very thin and hard to see, making them difficult to identify. They might be entirely covered by key work and not visible until a technician removes the keys. Cracks are typically repaired by pinning, although minor cracks are sometimes repaired with glue. The most common place for an oboe to crack is between the two trill keys on the upper joint, because of the tiny amount of space between them. If you suspect a crack, try looking for it under a bright light at the trill keys.
Instrument Selection
Beginning-model wood oboes are not always the best choice to purchase. The quality of wood on these instruments does not make them sound better than resin or plastic models; prone to leaks and cracks, wood instruments quickly become a liability. Wood oboes require special care and should be played consistently, so they are not a practical choice for most school programs where students might not be careful with them or the instruments sit in storage during the summer and are not played regularly. There are many high-quality resin and plastic oboes that are particularly well suited as school instruments and are a better choice.
The term full conservatory is often used to describe intermediate and professional oboes. Full conservatory means that all of the standard keys such as low Bb, left F, and F resonance are included. There are expensive intermediate oboes that lack important keys, such as left F and low Bb, and are not full conservatory models. I recommend avoiding these instruments all together.
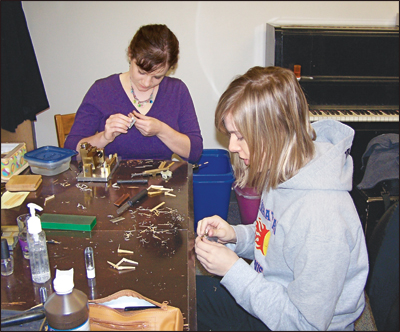
Finding a Good Reed
Many oboe reeds that are available for purchase are unsuitable for players at any level because they do not function correctly. When students play on a poor-quality reed, they do not make adequate progress with good air flow, embouchure, tone, intonation, dynamics, articulation, or vibrato.
Many student oboists assume that if their reed produces any sound, then it is fine. Consequently, as they notice that their sound is louder and more raucous than the other instruments, they become frustrated. All potential for an acceptable tone quality and intonation is built into the reed. Students should learn how to recognize the characteristics of a good reed from their first lessons because that information is an important component of oboe playing.
Crowing the Reed
Try this quick reed test to determine if an oboe reed is suitable for playing. Put all of the cane in your mouth so the lips touch only the thread. Take a slow and deep breath through the mouth and then blow strongly to produce a robust sound. The reed should respond immediately, vibrate freely, and have the pitch of C in two octaves.
If the reed is flat in pitch or if the sound is wobbly and unstable, then adjust or discard it. This process is called crowing the reed, and it gives oboists important information about how well the reed is working. Once placed in the oboe, a reed’s qualities become magnified, so if it does not play well on its own, it will be impossible to play the oboe well either. Crow a variety of reeds until you find one that easily crows octave Cs. If a reed does not crow, the problem is the reed and not the player.
Reed Characteristics
One characteristic to listen for in a reed is an immediate response. If a high-pitched chirping sound precedes the tone or if students are reluctant to articulate with their tongue on the very tip of the reed, then there is a problem with the response of the reed.
When looking at the profile of the reed, the two blades of the reed should stay tightly together all the way to the tip. If the blades splay apart even slightly, the reed will not respond well and can chirp. This type of reed problem is typically caused by a warp in the cane and cannot be fixed.
A reed should respond to air and articulation without any delay. If there is a delay in response, the very tip might need thinning or the reed might be leaking air through the sides. Learning basic reed adjustment techniques can benefit students greatly. Sometimes a couple of small scrapes of the cane can make an unusable reed into a good one. Basic reed adjustment can be learned through short summer workshops, books, or DVDs.
Handmade Reeds
I encourage students at every level to play on handmade reeds instead of machine-made reeds, which usually play flat and have a loud, unfocused sound. Most oboists quickly find a good source for handmade reeds, then eventually learn to make their own. Local music stores rarely stock handmade reeds or even oboe supplies, forcing student players to find specific specialty shops that are scattered throughout the country.
A great variety of high-quality handmade reeds and other oboe supplies are available through the internet and mail-order catalogs, and private oboe teachers often have them for sale. Students should try reeds from a variety of sources. Although handmade reeds can cost more than twice as much as machine-made reeds, they last much longer and are absolutely worth the investment.
Adapting to a Handmade Reed
Students who switch to handmade reeds at first may not like them because they feel uncomfortable to play. Although better in quality, these reeds have more resistance and require greater air flow, and some students are sensitive to the increased sensation of the vibration on their lips.
Ask students to take in a slow and full breath and blow on the reed only for a few brief periods, a few seconds at a time. After a few days of blowing on just the reed, it will no longer feel too resistant to play, and the correct embouchure muscles will begin to develop. Most players make this transition quickly.
Playing Sharp
In a recent masterclass with 18 high school oboists, everyone – from all-state musicians to students who had played for two months – acknowledged playing excessively sharp. This is something many oboists struggle with. There are two primary reasons for sharp pitch: the reed is flat or the embouchure is inflexible. Sometimes the embouchure is not flexible because it has become accustomed to playing on flat reeds.
It seems counterintuitive that oboists play sharp when their reeds are flat, but there is good reason for it. When the reed crow is lower than a C, the player responds to this flatness by pinching or biting the reed. The ear is much more sensitive to flatness than to sharpness and is inclined to make this adjustment. Pinching the reed will bring the pitch higher, but the pitch center is unstable and uncontrollable. There is no good way to consistently pinch the reed, and consequently, the correct pitch is not sustainable. Players overshoot the pitch, which becomes excessively sharp.