Over a period of 40 years I have had many opportunities to study the way clarinetists at all levels hold their instruments. I have learned to look for and fix some exceedingly common hand position mistakes:
• Collapsing the wrist in both hands to balance the clarinet.
• Trying to support the clarinet by placing the right index finger under the Eb side key.
• The left thumb parallel or perpendicular to the clarinet and not covering the tone hole.
• Keeping the right thumb too far under the thumb rest and not pushing enough to wedge the mouthpiece firmly beneath the top teeth.
• Holding onto the thumb rest with the thumb and right index finger.
• Fingers not covering the tone holes, which produces squeaks.
• Keeping the fingers too far away from the instrument.
• The left index finger lifted and placed too high on the A key.
• Fingers too flat and pressing against the keys.
Although this tool is often overlooked, clarinetists should use a neck strap, which alleviates the problem of a collapsing wrist trying to balance the clarinet. The strap takes the weight of the instrument off the hands and right thumb and permits the fingers to relax. A firmer embouchure is suddenly possible, and with it, tone that is immediately better.
If a student has the right thumb too far under the thumb rest, give him a quarter to hold vertically between the right thumb and index finger.
Holding two tennis balls imprints the correct shape of both hands for holding the clarinet in a C formation without collapsing the wrists. It may help to remind students that this formation is similar to holding a tall hamburger. This tennis ball trick is also a good remedy for teaching how to roll the left index finger when moving to the A key. While holding the ball, keeping the left index finger in contact with the surface of the ball and gently roll the index finger back and forth without losing contact.
To teach the concept of left thumb placement over the F hole, again have a student grasp the tennis ball, then pull it out of the student’s hand and ask him to quickly touch his left finger to his left thumb. This will be the correct placement, which should be neither parallel nor perpendicular to the clarinet body, but should point at a 30-degree angle to the clarinet. I suggest that students think of the thumb as pointing to one o’clock.
To make sure fingers cover the tone holes, use the Daniel Bonade technique of gently squeezing down on the keys with the finger pads before raising them. The best way to practice this is by silently covering the holes without playing. Begin with the right hand starting on low F and slowly go all the way up to Bb4, then back down to low F. Students should practice this at q = 60 repeatedly with their eyes closed. The speed should not increase until the fingers can move in sequence to the click of the metronome. To have fast fingers, it is first necessary to have even fingers.
The following exercise will help students develop an even finger technique in the chalumeau register.

Concentrate on keeping the fingers close to the clarinet and strive for beauty of tone. Students should pay attention to pitch on the crescendos and decrescendos. When the clarinet becomes louder it will go flat; this can be corrected by firming up the corners of the lips. The clarinet will also go sharp when becoming softer. This can be corrected by loosening the corners of the lips and not pushing with the right thumb. In both cases, students should keep airflow constant. A good analogy is to think of a fan at the end of the bell that must be kept spinning.
While students play the exercise, the teacher should put his hand over each student’s clarinet to check for air escaping from the tone holes that should be covered. Make sure that students’ fingers are arched and pointed downward rather than perpendicular to the clarinet. Another area to watch for is the skips from D4 to A4 and E4 to Bb4. If students are not rolling the left index finger, extra notes will sound. Only the tip of the left thumb should be used to touch the register key when playing Bb4.
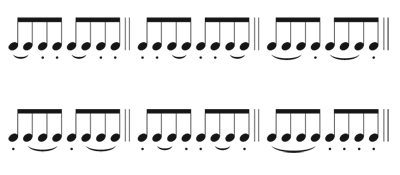
For variation, start the exercise on E4 and work backwards to low F. Other, more advanced options include transposing the exercise to F minor, E major, or E minor. For additional articulation practice, consider the following patterns for the first measure.
When students can easily cover all the notes in the exercise without squeaks, and with the air column producing a full and rich tone in the chalumeau range, they will sound much better and be able to perform music that includes the above technical concepts more easily.