
As flute choirs continue to increase in popularity, more flutists are purchasing alto, bass and contrabass flutes than ever before, both to play in flute choirs, and to explore the expanding solo and small ensemble repertoire written for larger flutes. Although the basic fingerings and written range are the same for all members of the flute family, differences in headjoint design and the larger diameter of the tubing in alto, bass and contrabass flutes require adjustments in air speed and angle.
Alignment
Headjoint alignment in alto flutes with curved heads, bass flutes, and contrabass flutes is more complicated than the alignment of one-piece concert flutes or straight-head alto flutes. Bass and alto flute headjoints are made in two pieces and contrabass headjoints have three pieces. It may take some experimentation to find a balanced set-up position.
The two most common set-ups for curved-head alto and bass flute headjoints are vertical alignment and horizontal alignment. In my opinion, vertical alignment provides better balance for the instrument, which makes it less tiring to play. Vertical alignment places the straight section of the head almost directly above the main tube of the instrument, with the embouchure hole level (parallel to the keys of the flute). When assembling the instrument, make sure that there is enough clearance for the left hand first finger to operate the C key. If there is interference, angle the curved section of the headjoint slightly back toward the player.
Horizontal alignment places the curve toward the player’s body so the headjoint is on the same plane as the main tube of the flute.
In both alignments, adjusting the position of the curved section will require adjustment of the straight part of the headjoint so the embouchure hole is parallel to the keys of the flute. Make small alignment marks on the headjoint sections with a permanent marker for consistent instrument alignment.
The headjoint of the contrabass flute has three sections that, when assembled, are shaped like a number 4 with the straight headjoint section perpendicular to the plane formed by the keys on the center sections of the flute. After the curves are adjusted properly, make sure the embouchure hole is parallel to the floor or turned slightly back toward the player. The headjoint segments should be adjusted so that the instrument is well-balanced; otherwise it may tend to twist to one side, making it uncomfortable to play. Mark adjoining headjoint sections with a permanent marker once a good set-up position is found.
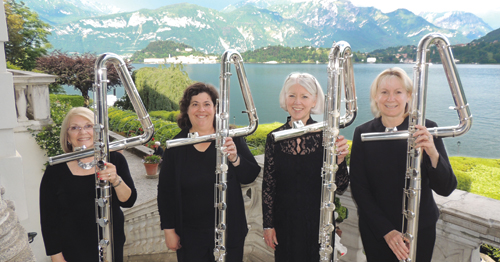
Contrabass flutes, like string basses, are played standing up and have an adjustable peg attached to the footjoint to customize the height of the instrument to the player. Set up the contrabass so the flutist can comfortably play on the headjoint while maintaining good posture. If the contrabass is set up a little too tall, step back from the instrument and tip the instrument slightly towards the player, using the peg as a pivot point.
When assembling alto, bass and contrabass flutes, avoid any interference with the operation of the keys. The spatula of the D# key of many bass flutes is shaped so that it extends past the joint connecting the footjoint to the center section of the instrument. Players with smaller hands may find the D# key easier to reach if they turn the footjoint in slightly towards them instead of lining up the rod of the footjoint with the center of the D key. Make sure that the operation of the D# key is not hindered by the post on the center section of the flute.
Air and Intonation
The alto, bass, and contrabass require successively larger volumes of air to achieve a pleasing and projecting tone. Vibrato should not be heavy or too slow – less is more. The air speed used should be slightly slower than for concert flute, especially for notes in the second and third octaves. If the airspeed is too fast when playing in the second and third octave, it may produce a harmonic instead of the desired note. While the upper octaves are the strongest and loudest for the concert flute, they are the weakest octaves for the larger flutes, but have a beautiful and ethereal quality.
When playing a low flute for the first time, get to know the instrument by playing long tones on free-blowing notes such as A, G and F in the first octave to determine the air stream angle and speed necessary to produce a good tone. Then repeat each of those first octave notes followed by the same note in the second octave to determine differences in air speed and angle between the octaves. When these notes can be played comfortably, proceed to playing octaves through the chromatic scale from the C in the first octave through the G in the third octave, determining similarities and differences in air speed and angle through most of the range of the instrument. In general, as the notes ascend, the angle of the airstream will tend to be higher, and the air speed will need to be slower. As the accuracy of playing the higher notes increases, experiment with a slightly faster airstream.
After warming up, tune the instrument with an electronic tuner. Check the pitch of several notes such as first and second octave A and a second octave D, and pull out the straight part of the headjoint until those three notes are in tune. It is likely that it will need to be pulled out a significant distance; my contrabass flute plays in tune with its headjoint pulled out more than an inch. Mark this spot on the headjoint with a short line drawn with a thin permanent marker.
Then play half notes in octaves throughout the range of the instrument and check the pitch with an electronic tuner. The upper octaves of many big flutes can be notoriously out of tune and require players to listen carefully and adjust individual notes to correct the pitch. Write down pitch tendencies of out-of-tune notes to learn how to compensate and play them better in tune. Alternate fingerings can sometimes improve the intonation of upper octave notes.
Articulation and Response
Response, particularly on low notes, can be improved by blowing (with warm air) on the pads of the flute. Pay special attention to closed keys such as the G#, D#, trill keys, and the footjoint keys. Adding a little moisture to the pads in this manner helps the pads seal better, resulting in a more resonant tone. This technique also works wonders on a concert flute. If low notes are sluggish in tongued passages, slap the G key as the low note is being articulated.
For best results, articulation should be crisp. Big flutes have the reputation of being ponderous in tongued passages, so pay special attention to articulation, so the beginning of articulated notes can be heard clearly. Adjust note lengths so the notes are not glued together. Forward tonguing, also known as French tonguing or spit rice tonguing, where the tip of the tongue peeks out from between the lips, is very effective.
Once flutists can play the first two octaves and part of the third octave, practicing material in intermediate method books, etude books, and solos is a fun and effective way to increase the mastery of the instrument.