Most people associate beginning string players with a scratchy, squeaky sound, but even young students on small instruments can begin to develop techniques that will lead to a beautiful tone. Some of the elements that affect tone and volume on a string instrument are bow pressure, placement on the string (contact point), and straightness and speed of the bow stroke. These factors work together to produce a good sound.
Position
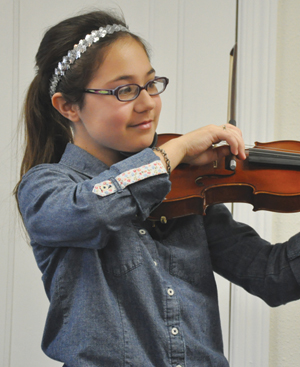
A proper physical set-up leads is essential for a warm, beautiful sound. Students should learn to hold the bow properly from the start. Problems in this area will persist and hinder a student’s progress for years. The right-hand fingers and thumb should be curved and relaxed. The right wrist should be as flat as possible when playing at the lower end of the bow (the frog). Display photos of beautiful bow grips for students to see and have a mirror available so they can see what their own bow hold looks like.
.jpg) If students struggle to flatten out the right wrist, have them try to balance a quarter or other small object on the wrist. Make sure the knuckles on the right hand are flexible and the elbow is at the correct level for the string that is being played (for example, the elbow will be highest on a violinist’s G string and lowest on the E string). The right shoulder should be relaxed and low.
If students struggle to flatten out the right wrist, have them try to balance a quarter or other small object on the wrist. Make sure the knuckles on the right hand are flexible and the elbow is at the correct level for the string that is being played (for example, the elbow will be highest on a violinist’s G string and lowest on the E string). The right shoulder should be relaxed and low.
For a student who tends to raise the right shoulder, tie two tennis shoes together and drape them over the shoulder. The student will feel the weight of the shoes on both sides of the shoulder and become aware when the shoulder moves or stiffens. To work on balancing the right hand and developing independence in the fingers, place the bow on the string (without playing) and pick up each finger individually.
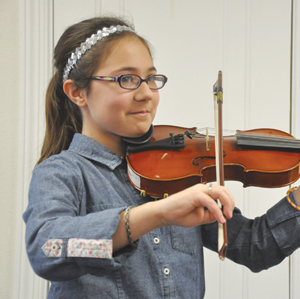
As students play, stop them periodically to check and fix the bow hold. It is helpful to teach a checklist for the bow arm: shoulder low, elbow at proper level, wrist flat, knuckles relaxed, each finger bent and able to move on its own.
Exercises
 1. The bow is most difficult to control at the frog, and many young string students avoid playing at the frog altogether. Have students play with a sixteenth-size bow so that they are forced to use the frog area. Show students that a harsh sound can be avoided if the fingers and thumb are bent.
2. To work on balance, students should play at the frog without the index finger on the bow. This allows them to feel the weight in the ring and pinky fingers that is needed to properly pull the bow. Students could also play at the tip without the pinky finger so they feel the importance of the index finger when playing at this end of the bow.
3. Many teachers place colorful tapes on bows to help students identify the three main areas of the bow: frog, middle, and tip. Sticky notes can also divide the bow into sections. Young students should segment the bow into three sections, while more advanced students can make more precise divisions of six or more parts.
4. Students often are uncomfortable playing at the ends of the bow. Set a metronome to a slow tempo and have students play one short (eighth-note) down bow, starting right at the frog, one beat of rest, and then one short up bow, starting right at the tip. While playing down bows, remind students to check their bow grips. Are all of the fingers bent? Is the wrist flat? Is the shoulder relaxed?
5. To improve coordination, create different practice patterns that alternate between the frog and tip. For example, students could play two short down bows at the frog (with a lift in between) followed by a short up bow at the tip, or three short up bows at the tip followed by a short down bow at the frog. Once students are comfortable traveling to the extremes of the bow, reverse the direction of the bow strokes to play up bows at the frog and down bows at the tip. For this exercise, use only one inch of bow on either end of the stick.
 6. A fun technique that helps students develop a stronger sound, is to flip the bows around and hold them at the tip instead of frog. With the frog now functioning as the tip, students will be able to feel the potential weight in that part of the bow. This forces students to use their fingers in their bow hand properly to control the bow. When they flip the bow around, they will continue to produce a stronger sound.
 7. Have each student place the bow on the string in the middle of the bow. Wrap your fingers around the upper half of the bow and have the student pull the bow against your resistance. Students should look at the string while they are playing. As a bow stroke is initiated, the string vibrates. This is easiest to see on the lower strings. See if students can make the string sizzle and vibrate on every bow stroke.
8. Students may notice that it is easier to engage the string on down bows than up bows. This leads to a common problem of strong-sounding down bows and weak up bows. To solve this, ask students to play down bows mezzoforte and up bows fortissimo with accents to even out the strokes.
9. Young string players often struggle to pull a straight bow. As the bow approaches the tip, students pull the right arm in towards the body. This makes the bow skid out over the fingerboard. (Bowing over the fingerboard produces a weaker, wispy sound.) Ask students to practice whole bows on the bridge (sul ponticello), or as close to the bridge as they can play. As they strive to keep the bow next to the bridge for a whole bow stroke, they will feel what a straight bow feels like. In order to pull the bow straight at the tip, the arm extends out from the body. Because the angle changes with different strings, practice this exercise on all four strings.
10. Another exercise is to have students play a crunchy, whole bow right next to the bridge. Then tell students to back off from the crunchy sound (don’t press so hard) while staying close to the bridge. They will be able to play a loud, focused and sustained sound.
Listening
Students need to hear beautiful, big sounds to understand what is possible on their instrument. Play recordings when students enter for lessons, and encourage them to attend concerts or watch YouTube performances. Watch videos of professional string players with your students and examine the shoulders, elbows, and bow grips. (“The Art of Violin” series produced by PBS is a great starting point.) Have students identify which parts of the bow performers use, as well as which bow strokes are demonstrated. Students should try to describe different performers’ sounds. For example, string sounds are often described as bright, dark, rich, sweet, thin, piercing, or powerful. When a concept of sound is born, students will be able to start creating their own sound and style.