
When graduating music education majors or early-career ensemble directors are asked which area they feel weakest in, chances are that many would say score study. Although young teachers are quick to note its importance, few are taught a systematic but practical approach to score study – one that can better inform them about the music they plan to teach and help them construct purposeful lesson plans and rehearsal strategies. The following approach was developed by picking the brains of numerous conductors over the years at academic institutions, masterclasses, and workshops. It can work for band, choir, or orchestra.
Investigation and Discovery
The three parts of studying a score are acquiring background information about the composition and its composer, determining the compositional architecture of the music, and identifying and troubleshooting conducting concerns. Concerning the composer’s background, it is important to know birth and death dates, their musical training, primary instruments, important jobs, and significant compositions. All this can greatly inform performance practices, including style, articulation, and vibrato. It will also come in handy when writing program notes and can be shared with the ensemble during rehearsal. Although it may seem obvious, it is important to acquire as much information about the composition as possible. Factors to consider are orchestration, the number of sections or movements, when the piece was written, when it was first performed, how it was initially received, and how it is viewed today.
Be aware of digital and hard copy resources that even the most experienced conductors come back to time and again. The Teaching Music through Performance series is incredibly valuable for band, choir, and orchestra teachers alike. In addition to chapters on various pedagogical subjects, there are countless entries on compositions of all grades, with information about the composer, composition, historical context, form and structure, and technical and musical factors.
Going to publisher websites can also be beneficial, especially for perusing sample pages of the score, listening to excerpts of the piece, and learning more about the overall level of difficulty. For music by living composers, information is often included in the preface to the score, and even more can be learned by going to the composer’s website and social media sites.
Compositional Architecture
For this stage, a number two pencil, a red pencil, a blue pencil, and a ruler are needed. I highly recommend listening to recordings early in the score study process, so you might want headphones as well.
Think of the score as a present you are opening for the first time, and take the opportunity to marvel at this shiny new toy and its myriad pieces. As you listen, ideally from a wide variety of ensembles at varying levels, turn the pages, look for moments that catch your eyes and ears, even if you do not yet know why that moment in the music is noteworthy. All these will be possible clues about the overall compositional architecture.
After that first listen, use the red pencil and ruler to mark divisions between the systems on each page of the score. Band conductors probably have many lines of instruments per page and no systems to separate, but choral conductors might have multiple systems of music on a page. It is terrifying to realize an ensemble you are conducting is not playing where you thought they were, especially if this happens during a concert. Clear red lines separating each system direct your eyes where to look.
One way to think about the architecture of a piece is as a big picture that is comprised of smaller pictures that have still smaller pictures within pictures that can all be put back together to form one big picture. Browse the score, keeping tabs of places that catch your eye and focusing this time on changes in dynamics, instrumentation, and articulation. These moments will help you break the big picture into slightly smaller pieces, such as units of 32 measures, the A section, or the Theme One area.
Then start to look for phrases and cadences. I encourage students to look for the usual suspects of eight-measure phrases, most of which break down into two four-measure subphrases. With the blue pencil and ruler, draw a line from the top of the page to the bottom of the system. I indicate lengths of phrases at the top and then circle the number. Below the circled phrase length, I indicate the length of the subphrase. Some conductors use a solid blue line to indicate phrases and a series of blue dashes to indicate subphrases. I have also seen a system that uses a dark blue for phrases and a lighter blue for subphrases. Pick one system that is meaningful to you and be consistent.
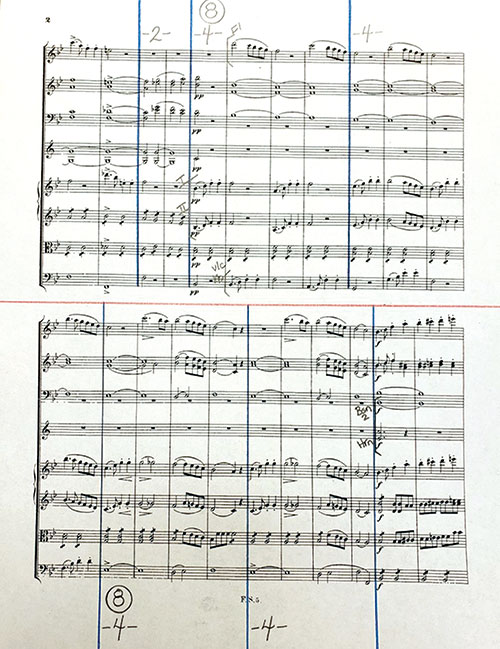
Useful markings include red lines between systems and blue lines between phrases.
Once a large section of the music has been identified and you have labeled a few phrases, it is time to study the events taking place in each section of the music. Determine which instruments or sections of the ensemble will need cues from you and who has important melodic material. With a pencil, I mark the name of the instrument next to the part in question. Use abbreviations that make sense to you at a glance. Some conductors like to use Italian abbreviations for cues.
I use the red pencil for dynamics and articulations. If the entire ensemble or a large section within the ensemble has the same dynamic, I write one general dynamic marking in the score near the section in question. Some conductors write the dynamic near every instrument in the score, but this makes the score look cluttered and difficult to read. When there are symbols for crescendo or diminuendo, I trace over these symbols with my red pencil so that these changes in dynamics pop out of the score. I do the same for fortepianos, sforzandos, and accents. Some conductors indicate softer dynamics and diminuendo with blue pencil and then louder dynamics and crescendo with red pencil. If this hot versus cold, getting colder versus getting warmer, makes more sense to you, then go for it. Consistency is key.
Once you have completed these initial steps for for all sections of the piece, look for patterns and trends throughout the composition. For example, if you are studying the first movement of a symphony, compare the first theme in the exposition against the first theme in the recapitulation, taking note of similarities and differences. It is also helpful to compare tonal areas throughout the composition. Being aware of these patterns and trends will greatly influence your rehearsal lesson plans.
The next step is mostly housekeeping. Take notice of measure numbers, rehearsal letters, and foreign terms, and then compare your score to the parts you will distribute to students. Make sure that both score and parts use the same measure numbers and rehearsal markings.
If there is a large number of measures between printed rehearsal marks, add new ones to split the difference. I find it helpful to add measure numbers at the beginning of each system of my score and at the start of each phrase. Also, in rehearsal, I will refer to a spot in the music as “eight measures before Rehearsal A or measure 24 – whichever is easier to find.” Once the students notice that you refer to this passage repeatedly in rehearsal, they will realize that this is an important place in the music.
At this point it is time create tentative rehearsal plans based on the difficult passages you have studied, whether the challenge stems from technique, balance and blend, or intonation. Being aware of these places, knowing for whom or what section it will be difficult and why, and preparing advice in advance will make for productive rehearsals.
This is also a great time to determine goal tempos for the performance and the rehearsals, based on your initial listening to recordings and the insights gained from score study. Keep track of these tempos in your lesson plans and score. I encourage teachers to share goal tempos with their ensembles and to let them know what your rehearsal tempos will be. This helps students practice more efficiently and know how close they are to the performance tempo.
Time the entire piece as well as individual movements or sections. This way you can plan the timing of ending rehearsal with a full run-through and still have time to offer some assessments to students before they are dismissed.
Conducting
Until you know the score – how all the pieces of the puzzle come together – your hands are essentially useless. While conducting through each smaller section, sing each line. If you have a competent keyboard background, play each line at the piano separately, and then play multiple lines. Practice conducting at your desk first, then in front of a mirror. Remember that gestures that we think are clear might be difficult for the ensemble to read. If the piece is fast or rhythmically complicated, practice conducting to a metronome at various speeds, as opposed to conducting along with the recording.
By this point in the process, you should have a relatively firm understanding of the music. You will also have made preliminary rehearsal plans based on score study up to this point. When it comes time to rehearse, teach the music in small pieces and then put smaller pieces together. This has the added benefit of informing students how each chunk fits into the larger context. If the music has material that returns later in the piece, encourage your students to transfer knowledge to help save time in rehearsal. This is also an excellent way to teach your students about performance practice so that the next time you perform a piece by the same composer, the students will understand the composer’s style or time period.
Final Thoughts
Ultimately, what matters most is that you use a system that is purposeful, means something to you, and can be used on any piece. When returning to a piece you have already studied, the markings in the score will remind you of everything.


