We all became music teachers because of the influence of a great musician, someone who embodied the wonderful experiences we grew up with. As educators we strive to share those feelings with our own students in any way we can. The visual teacher can inspire students to exceed what they thought was possible and gain an emotional reaction through their performance. No matter your visual style, these tools can help your students become the performers that you envision.
Fundamental Formations
When working on the fundamentals of marching we typically use three formations, each with particular strengths. The first formation gathers students in a cluster around the director. Each performer should be able to see the instructor and have enough room for movement. This formation is ideal for introducing new concepts or covering details for which I want students to see me. In the cluster, there is the best chance for communication; all students have a direct line to the instructor, who can simply turn around the circle to get an equal sampling of performers.
We use the cluster often in band camp, when students are learning a lot. It is also an excellent way of starting rehearsal; most visual rehearsals start off with staff detailing a specific area of technique for students to focus on. I prefer not to demonstrate in a block, because as in a typical classroom, the students who are closer to the teacher have a better opportunity for understanding the information.
We can do most movements in the cluster. I can have students face in toward me or turn 90 degrees to the side so I can inspect students from a profile. If I need students to move forward, I might have them back up eight steps and then come toward me. I’ll also have them march around the circle. Although the cluster is not meant for large exercises, it is easy to get in eight to sixteen counts without condensing too much.
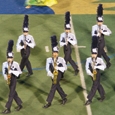
The most commonly used formation is the block. The block is great for comparing performers side-by-side. Many times we will combine lines because the smaller side-to-side interval allows for us to get a better vantage point. The drawback to a block is losing contact with the students furthest away from you. To minimize this, we rotate who is up front. After a rep or two, we send the front row to the back and have everyone else move up. This keeps students active and gives us an opportunity to look at every row. We do that side to side as well.
The final formation, called across the floors, focuses attention on one row of students at a time. A row usually consists of five to ten people, depending on the exercise. If there is something I want to hone in on a bit more, I use a smaller number, but if I can use a broader view then we use more students per line to go faster. Students in row one go immediately after count-off. If the exercise is 16 counts, the next line waits for first 16 counts and then steps off. Every line does the same thing, but students are separated by a yard line or two.
This formation makes it easy for instructors to give great individual feedback. Staff members focus on the row going by them at the time. Another advantage to this format is that students who do not have it right the first time can try again. I tell students, “If your name gets called out, I want you to run back to the beginning and try this skill again.” It makes students work hard to get the exercise right and helps them understand when they need additional instruction. Even the older students who get sent back will come up to me after and ask for personal guidance. When it gets down to the last 10-20 people, we allow everyone to continue through to avoid isolating the same individuals at the end.
 Foot Timing
There is more to great foot timing than having the foot hit on the beat. In most cases the next step to perfecting timing is defining the back leg. I ask directors at clinics when they think the back leg should release, and more often than not, it has not been defined. Some say the back leg should release on the fourth sixteenth note of a beat, but when marching at any speed higher than 80 beats per minute, there is no way students can feel this. We teach students to release the back leg exactly on the beat, at the same time the front leg hits; one foot touches and the other releases at the same time. If the release starts when the other foot hits, then the legs should evenly cross at the and of the beat.
Beyond placing the focus on the first and last count of a maneuver, it is equally crucial to stress count two. Even if everyone is exact on count one, there is still no guarantee that everything will be correct going forward. If count two is locked in, performers maintain excellence through the set. Vocalization is an excellent way to teach students to focus on getting the second count of a maneuver correct. If students are marching but not playing, we have them count out loud, emphasizing two. It also takes close scrutiny on the part of the staff to make sure students are hitting this count correctly.
Perhaps the most important key to impeccable timing is to hold students accountable every time. No matter the exercise, timing can be a priority. In the circle, block, or across the floors, students will have to reset immediately for poor timing. This is never done out of aggravation, but rather an expectation of performing correctly. We cannot be perfect, but we can be right.
Weight Control
One of the most important concepts in marching technique is where our weight is. Directors rarely see error related to weight distribution, because this problem often manifests as tightness, bouncing, or poor timing. It is more likely that the real problem was a student’s center of gravity being too far forward or backward.
We have students keep their weight slightly more on the balls of the feet, because when the weight is on the heels it leads to slouching. When students are standing still, the weight should feel roughly 60-40 toward the front. I then get students in the cluster, have them back up eight steps and then march toward me as they normally would, with the instruction that they remember how that feels. When they reset, then I tell them to lean a bit further forward, giving them five percent further as a target feeling, and we march forward again. When we finish, I ask students if it felt better or worse to any of them. If some students think it felt better, those students should keep their weight slightly forward like that when they march. The body naturally indicates what feels right. We repeat the exercise but with students shifting their weight five percent further back than normal. Students who like this feeling better should march this way. We practice this on forward march, backward march, and slides; each performer will make a slight adjustment for each style of marching.
Dot versus Form
In many organizations there is a debate on dot – focus on getting students to a specific spot on the field – versus form – focus on keeping the visual together over hitting a specific spot. Each method has merit.
Our program changes the focus on dot and form depending on the month. August and much of September consist of learning the show. Although we make form comments at times, these months are mostly focused on dots, so students can start the season by holding themselves accountable. The last week of September – the week before the first contest – is when we start making more form comments from the box. At this point we aim for a ratio of two thirds dot and one third form. By the third week of October, we are in cleaning phase. Although we check dots so people do not drift too far from where they should be, two thirds of our comments this time of year are on form. The transition over the season falls in line with the learning process, the natural progression of the show, and gives essential definition to our members. Almost every band has a staff member or student endlessly worried about whether people are on their dots, but having a clear schedule reduces such concerns drastically; the leadership team understands what is expected.
Complementing Rehearsal Plans
In a music rehearsal, the warm-up will consist of skill development needed in rehearsal that day. For example, we may work on connecting the line of a chorale before playing Amazing Grace so that particular skill can transfer straight into rehearsal. The same goes with visual fundamentals. If there is a moment in drill at which performers are struggling with a back-to-front direction change, work on that skill in visual warmups the day you plan to clean that section of the show. Visual fundamentals are part of our students’ education and should be planned accordingly so students can immediately apply what they learned.
When forming a plan for visual fundamentals, try to experience your students’ struggles. We can learn a lot by putting on a sousaphone and marching backwards at a six-to-five step. This will allow you to formulate new ideas that can help your students. Show students how excited you are about the visual program by experimenting and coming up with new exercises and ways to teach something as fundamental as posture. When you invest in the visual program the students will love it just as much as you do.

 Adrian D. Griffin is principal trumpet with the Orquesta Sinfonica de Monterrey (Mexico). As a clinician, Griffin has appeared at The Texas Bandmasters Convention, The Texas Music Educators Association, The Iowa Music Educators Association, and The New Jersey Music Educators Association. In 2012 Griffin’s book was published by Oxford University Press. He is a performing artist and clinician for Yamaha, Denis Wick, and Schagerl Trumpets of Austria.


