
While listening to trumpet students perform an orchestral excerpt by Stravinsky for an ensemble audition last year, I heard a wide range of musical expression from sensitive to uninspired. The varying interpretations were particularly interesting because Stravinsky wrote minimal expressive markings for this passage. How a musician interprets melody is one of the fundamental skills that separates a skilled amateur from a seasoned professional. Some students will not interpret melody unless prompted by expressive markings on the page. Others rely solely upon the ensemble conductor for melodic inspiration. Students should learn to interpret melody beyond the symbols that are indicated on the page; this fosters true artistry and creativity. My clarinet teacher, Stanley Hasty, professor emeritus of clarinet at the Eastman School of Music, taught various principles of interpretation that can be applied to any melodic passage.
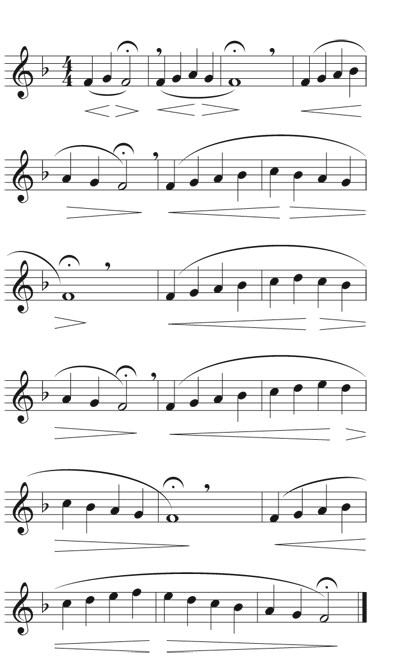
The first principle, called shaping the phrase, is quite straightforward and an excellent starting point for teaching students how to interpret melody. Within a melodic passage, crescendo when the notes go up in the melody and decrescendo when the pitches go down. Many times composers expect this to happen naturally even if they do not notate it in the score, and great musicians do this intuitively. Dennis Beck uses the following exercise, called returning scales, to address this. It can be transposed into any key.
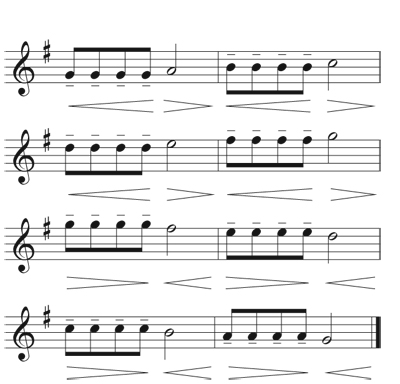
The second principle is that sustained tones or repeated notes should not remain static; they either crescendo or decrescendo. Which choice will be made depends on the context of the musical phrase. Using scale work again during the warm-up, have your ensemble alternate repeated eighth notes and half notes on various scale degrees. With each repetition, apply either a crescendo or decrescendo to the sustained or repeated note in this manner.
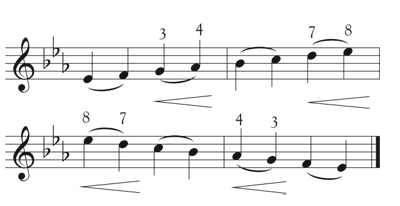
The third principle is to make melodic intervals expressive. Violinists use a technique called portamento for melodic leaps in either direction. Wind players cannot slide into these upward pitches but can connect these notes by increasing the air pressure on the first note and allowing the subsequent note to appear as a result of the airflow. A good way to teach this principle is to play diatonic intervals up and down from tonic. Students should produce a strong first note that leads to the second pitch of the interval with no break in the sound. Additionally, the upper note should not crescendo out of context relative to timbre or dynamic.
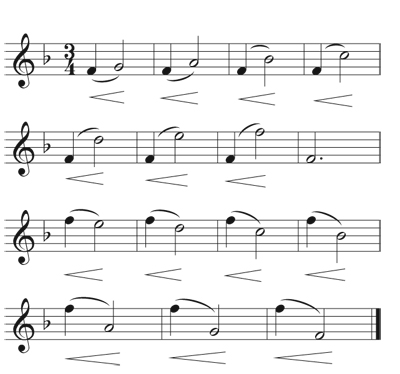
The fourth principle addresses the concept of ebb and flow, or tension and release, in the music. It can first be demonstrated with a major scale. The half steps that occur between the third and fourth and seventh and eighth scale degrees are excellent examples of the relationship between dissonance and consonance. While performing unison scales, point out how the seventh scale degree resolves to the eighth degree, which adds a sense of tension to the musical line. The same phenomenon can be felt when the fourth scale degree resolves down to the third. Practice this exercise slowly so that you can feel the gravitational pull of the half step into the more consonant scale degree.
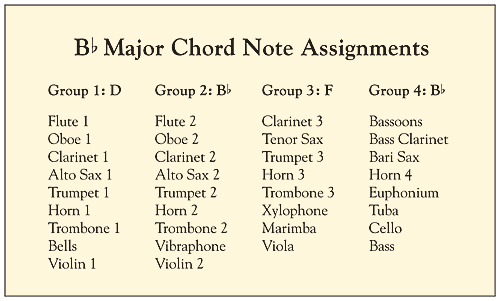
The next step in showing the relationship between tension and release is to use a highly dissonant chord that resolves to a tonic triad. To illustrate this point, John Paynter would assign students to a Bb major chord using the chart below. After the students balance this chord, ask them to choose a note far away from that pitch and hold it. This highly dissonant collection of notes should resolve to the Bb major triad. The progression from dissonance to consonance will be obvious but feel even better if you have students crescendo through the dissonant chord to the resolution.
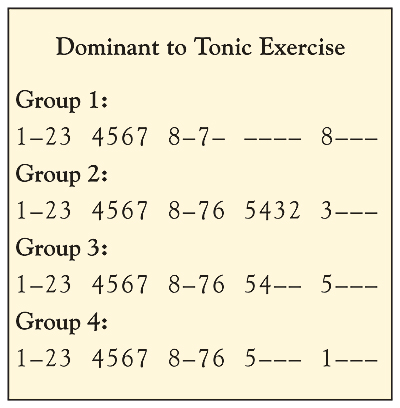
Dissonance and consonance can also be illustrated with simple chord progressions. The building of a dominant seventh chord that resolves to tonic is a more sophisticated example of the way tension and release operates in a musical passage. The example below can be performed in any key by using scale degrees performed by different voices in the ensemble.
After students experience how to find examples of tension and release in scales and chord progressions, it is natural to start using chorales to illustrate this principle by isolating dominant-seventh-chord-to-tonic cadences. The idea is to crescendo through the dominant seventh chord in the phrase and then release the tension on the cadence to tonic with a decrescendo. This gives the musical phrase momentum and a sense of direction.
These four principles, can open up a whole new world of expression and musicality. Students familiar with these techniques have taken the first step in exploring musical imagination and creativity.